If you are planning to use a biscuit joiner to construct your furniture, here are some tips: choose the biscuit size that best suits your furniture needs, make sure that the bottom shelf line is level, and use proper safety equipment while using the machine. For home improvement projects that involve joining two pieces of wood, the biscuit joiner can be a useful tool. Find out more. Also, learn about biscuit glue, safety equipment when using a biscuit joiner, and more.
How to choose a biscuit joiner
You may be a DIYer and want a biscuit joiner that can handle all types of wood. Cabinet shops might need a stronger model. Regardless of your requirements, there are biscuit joiners to suit your needs. Some have storage and are easy to maintain, while some are more robust. To help you choose the right biscuit joiner, take a look at the following factors:
A variety of factors are important when choosing a biscuit jointer. It is versatile and can be used across many applications. The Biscuit Joiner's knife should be large enough that it can accommodate many materials. The machine should offer a variety settings and have an ergonomic handle. You should also look for a machine that has a dust extraction port. Choosing a biscuit joiner should be easy and convenient.
Choosing a biscuit
There are several things you should consider before purchasing a biscuit jointer. You will need to choose the right biscuit joiner for the job. Biscuits come as many shapes and sizes. The most common sizes for biscuits are #0-10 and 12-15 mm. The materials used to make biscuits include plastic, PVC and metal connectors. A key feature to look out for is the blade size. The biscuit joiners that have carbide teeth are more durable than other types, so be sure to look at the blades.
You should consider how often you'll use your biscuit joiner when you are choosing one. Do you plan to make furniture or build cabinets? A medium-sized biscuit joiner will do the job for general woodworking. But if your project is more complex, you'll need a bigger model. You can choose between a Corded or Cordless model, depending on what you need. After you have chosen the best biscuit joiner, select the one that offers the most speed to ensure maximum control.
Gluing biscuit joints
A biscuit joiner can be used to join wood pieces. Unlike nails, biscuits absorb the glue they're placed in and swell to form a precise alignment. If you don't use enough glue, the joint can fail or be misaligned. To avoid this, use a water-based glue. The glue should be inserted into the slot rather than onto the biscuits. Popsicle sticks can be used to spread glue and ensure biscuits are secured to the wood.
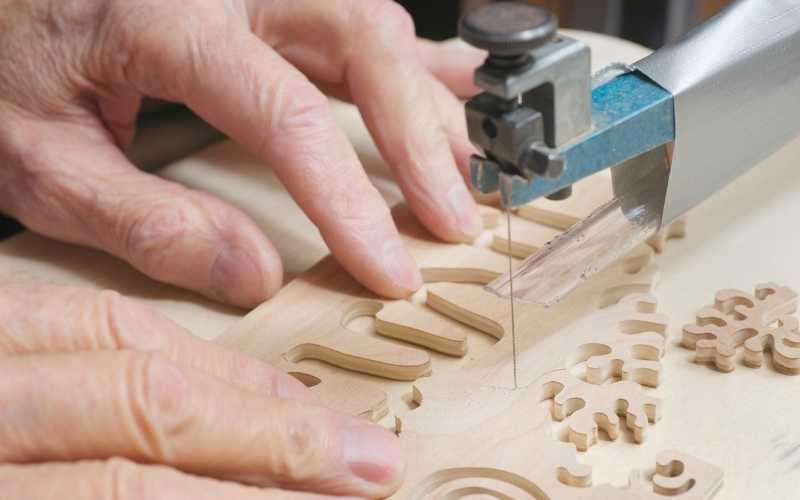
A biscuit joiner is a saw that cuts a hole in the wood, then drops wood biscuits. The biscuits are stronger and more durable when glue is applied. A biscuit jointer is typically used to join panels. Norm Abram shows how he glues a panel together using a biscuit joininger.
Safety equipment to be used with a biscuit jointer
A few safety precautions should be taken by every biscuit joiner user. These precautions include never adjusting the biscuit joiner while it is in use, not pulling or straining the power cord, and never reaching under the workpiece with the cutting blade running. Always make sure that the blade cover as well as the cutter head are securely closed. Never allow the biscuit joiner to run while the blade cuts.
The biscuit joiner can be used to cut biscuits by one hand. You should secure workpieces to a workbench so they don't move during the biscuit cutting process. The biscuit joiner can inadvertently cut too deeply into the board. The blade may snap through the board if it is accidentally cut too deeply. Wear safety glasses and a mask when you are cutting.
The testing of a biscuit joiner

You need to learn how to test a biscuit joiner before you use it. To do this, you can mill a slot from a piece or wood. Gently insert the biscuit in the slot until it pops out, and mark the biscuit's bottom with a pencil. Once it's inserted fully, remove it from the slot and test the other edge. You must ensure that it isn’t jammed, blocked or has no other objects.
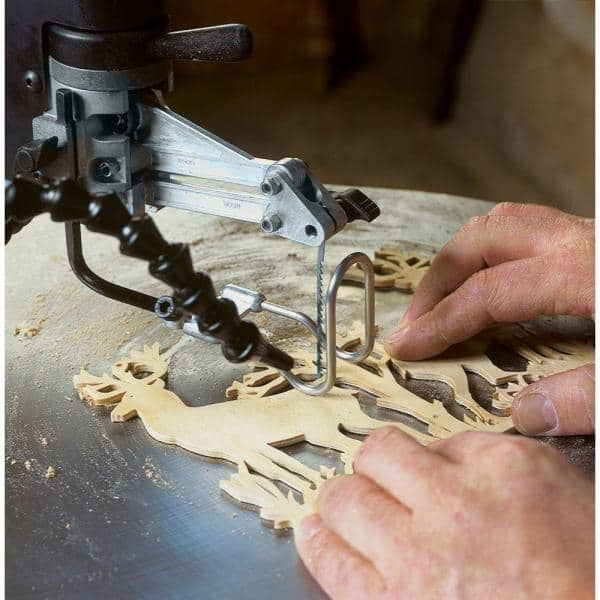
Moreover, biscuit joiners come in a variety of sizes. Check out the details to determine which one is best for you. There are two types, handheld and floor-mounted biscuit joiners. You can pick one depending on the size job you are looking for. You can then choose the size that best suits your needs. Biscuit Joiner 90deg for instance is lightweight and can be used at a maximum angle 90 degrees.
FAQ
How do I know what tools are best suited for me?
It's important that you consider your needs and preferences while shopping for tools. Do you prefer metal or plastic handles What size nails and screws do you usually use? Do you prefer to use hand tools or power tools?
What is the difference between plywood and particle board?
Plywood consists of layers made from wood and pressed together by pressure. Plywood comes with a range of thicknesses, and it is most commonly used for flooring and cabinets. Particle board is made from sawdust mixed with resin and then compressed into large blocks. It's used for home improvement projects. Both types of boards can be easily cut and are durable.
Can this be a way to make money?
Yes! In fact, most woodworkers already have it. According to U.S. Bureau of Labor Statistics (BLS), woodworkers earned a median annual salary of $34,000 in May 2012. This is significantly higher than the national average, which is $31,000 per year.
How can you calculate woodworking pricing?
It is essential to calculate costs as accurately as possible when pricing any project. Always make sure you get the best price on materials. It's also worth taking into account all the other factors that may affect the cost of your projects, such as time, skill level, and experience. If you want to get an idea of what you can expect to spend on different types of woodwork projects, check out our guide to the average price of common household DIY tasks.
How can I tell what kind of wood I am working with?
Always inspect the label when buying wood. The label should detail the wood species, its moisture content and whether it has been treated or not.
Statistics
- Overall employment of woodworkers is projected to grow 8 percent from 2020 to 2030, about as fast as the average for all occupations. (bls.gov)
- Average lumber prices rose about 600 percent between April 2020 and May 2021. (familyhandyman.com)
- Most woodworkers agree that lumber moisture needs to be under 10% for building furniture. (woodandshop.com)
- In 2014, there were just over 237,000 jobs for all woodworkers, with other wood product manufacturing employing 23 percent; wood kitchen cabinets and countertop manufacturing employing 21 percent. (theartcareerproject.com)
External Links
How To
Tips on how to drive a nail in wood
It is essential to pick the right size and style of hammer before you can drive a nail in wood. The most commonly used types of Hammers are claw hammers. Each type of tool has its advantages and drawbacks. A claw hammer, for example, is the best choice if you need to hit nails hard. However, it's not easy to know exactly where the impact will land. A sledgehammer is great for hitting large areas at once, but it's too heavy to use effectively for smaller tasks.
After choosing the right hammer, place your hand flat against the side of the head so that the handle rests comfortably in your palm. You can grip the handle with your fingers, but not so tight that it causes injury. The hammer should be held straight up with your wrist relaxed. You should then swing the hammer straight up, keeping your wrist relaxed. You should feel the impact on the nail from the hammer. Try swinging a hammer using a block wood to practice until you are comfortable.
Once you are ready to drive the nail, place the hammer close to your body. To ensure that the nail is perpendicular on the surface of the wooden floor, position it. Keep your eyes on the tip. Swing your hammer forward. Then follow through with the motions of the hammerhead. Repeat this action several times, gradually increasing the speed of the swing. Once you've mastered the technique, try adding power to your swings. Then, raise the hammer from your shoulder to bring it down. This way, you'll be able to put more energy behind your blows.
Once you've nailed the first hole, remove the hammer from the nail. To pull out the remaining nails, use a screwdriver or pry bar. To avoid splitting the wood, make sure the nail heads are not touching the board's surface.