This is the place to learn how to carve wood-carved caricatures. You will learn all about the design and safety. You can make a simple caricature into an artful masterpiece. If you're unsure how to start, read on for some tips to make your caricature as unique as possible. There are also classes offered by caricaturists.
Techniques
Wood carving caricatures can be a very unique type of sculpture. They're funny and can tell a tale without words. Caricature can be described as an exaggerated depiction of a real person. Dave Stetson and other wood carving carvers adhere to strict rules to ensure realistic results. This article will discuss the basics and give some tips for creating a caricature.
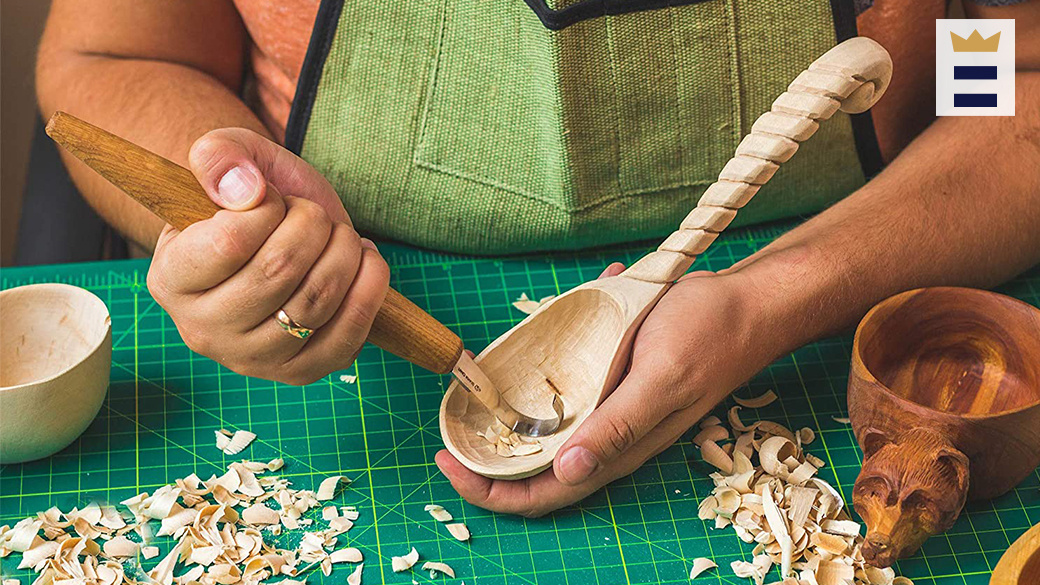
First, it takes a lot of focus to carve an astronaut. To carve an astronaut, you will need to use whittling knives or spoon carving knives. These are delicate tools. You can also use templates to help you make your work easier while carving the astronaut. A good tutorial will guide you through the process of creating your cartoon. If you're working on a budget, you might want to look into buying a tutorial for this specific subject.
Designs
There are many methods to make wood-carved caricatures. A pattern is a good place to start. You can also buy a cardboard cutout to use for different types caricatures. You can also use the tutorial to carve a caricature. This article will provide information on the best methods and designs to carve a caricature.
Fred's first caricature was titled "Aristocrats of the Roads". It featured two men-wanderers. It was carved out of Honduras Mahogany. Fred entered it in competitions, winning several awards. He also featured it on the Chipping Away Catalog. Fred created a second Luciano Pavarotti caricature in 2009. He won a Second Runner up Award at a national woodcarving convention.
Eyes
It is important to ensure realistic looking eyes when carving caricatures. There is nothing wrong in having realistic looking eyes. However, viewers may not be satisfied with a caricature lacking the right amount detail. You can use the following steps to ensure your eyes are symmetrical: Take a photo and trace the outline of the carving.
Next is to determine the eye shape. Some carvers use the exact same eye shape, while others may use a different one. Others use different shapes to create more believable eyes. Stop cuts can be used for symmetrical eye shapes. Finally, you'll need to carve your pupil and iris. Now you are ready to start carving the caricature.
Safety
Unique wood carving caricatures have unique designs. They can tell a story without words, and the artists that create them take great care to ensure the accuracy of their work. Caricatures are often described as depictions of people or things that are exaggerated to convey an impression, or satire. Dave Stetson, a wood carving carver, has set strict guidelines for safety and quality. He also provides information to consumers.
First clean the wood and remove pencil marks before carving a caricature. Use dish soap or water to clean the surface. You can carve the neck or head with a V-shaped tool that is 60 degrees. The 60-degree V-shaped tool is a good choice for carving, as it can easily cut wood. A good choice for this type of tool is the Ramelson 60-degree V-shaped carving tool, as it is sharp and easy to use.
Materials

Learning how to carve animals using materials such as wood and wire is a fun and challenging method. Although animal caricatures don't have the same level of detail as human ones, they are still very entertaining and can tell stories without using words. Caricatures are exaggerated realisms. While carving caricatures is a difficult hobby for beginners, it can be very rewarding for those who are more experienced.
For carving, you will need chisels along with a wooden board. Also, a hammer is necessary. Acrylic white paint, which can be purchased at a craft store, is the first layer. After you have completed the base layer, you can move on to the second layer. The next layer will consist of a mix of golden brown paint with a few drops burnt sienna. (Academy). For the face, use 2 drops sunkissed purple.
FAQ
Where can I purchase woodworking supplies
There are many places where you will find everything that you need. You could go to your local hardware shop or visit websites such as Amazon.com.
You might also consider flea markets and garage sale for any old furniture or other materials you could reuse.
How do I get started as a woodworker?
Woodworking takes practice and patience. It takes time to master all the tools and techniques involved in woodworking.
There are many options for woodworking equipment today. Some people prefer using power tools while others prefer hand tools.
You have the freedom to choose what tool you want, but it is important that you select the right tool for your job. You might start with a simple set of tools if you don't have much experience.
A router is a tool that cuts intricate shapes in wood. You can also learn how to use it. These tools can be purchased at most hardware stores.
What else should I know about woodworking in general?
Furniture making is a laborious task. It's easy not to appreciate how hard it is. Finding the right kind of wood is the most difficult part. It is difficult to choose between the various types of wood.
The problem with wood is that not all wood properties are the same. Some woods will warp and others will split or crack. You must take these things into consideration before purchasing wood.
How can I learn basic woodworking skills
You can start building furniture by making a bench. You can do this project using any type of wood you have on hand at home. If you aren't sure what type of wood to use, you can buy cheap pine boards from Lowes or Home Depot. You'll need to sand the bench after it's built. Then, finish it with varnish or a stain.
What is the difference between plywood and particle board?
Plywood is made up of layers of wood pressed together under pressure. Plywood can be cut to different thicknesses. It's commonly used as flooring and cabinets. Particle board is made up of sawdust mixed in resin, then compressed into large pieces. It's used for home improvement projects. Both types are sturdy and easy to cut.
How often should I get new supplies?
Some tools will need to be replaced over time. If you're using hand tools, you'll need to sharpen them regularly. And if you're using power tools, you'll need replacement parts periodically. Try spreading your purchases over a few months so you don't buy too many at once.
Statistics
- In 2014, there were just over 237,000 jobs for all woodworkers, with other wood product manufacturing employing 23 percent; wood kitchen cabinets and countertop manufacturing employing 21 percent. (theartcareerproject.com)
- Overall employment of woodworkers is projected to grow 8 percent from 2020 to 2030, about as fast as the average for all occupations. (bls.gov)
- The best-paid 10 percent make $76,000, while the lowest-paid 10 percent make $34,000. (zippia.com)
- If your lumber isn't as dry as you would like when you purchase it (over 22% in Glen Huey's opinion…probably over 10-15% in my opinion), then it's a good idea to let it acclimate to your workshop for a couple of weeks. (woodandshop.com)
External Links
How To
How to drive a nail through wood
When driving a nail into wood, it is important to first choose the correct size and kind of hammer. There are many types of hammers that you will find: claw hammers and sledgehammers; mallets; ball peen hammers; and hatchets. Each type of hammer has its pros and cons. For example, a claw hammer works best when you want to hit something hard, like nails; however, it's difficult to control precisely where the blow lands. A sledgehammer allows you to hit large areas simultaneously, but it is too heavy and cumbersome to use for small tasks.
Place your hand flat on the side of your chosen hammer so that the handle rests in your palm. Take the handle and hold it with both hands. But don't press down so hard you injure yourself. Hold the hammer straight up, keeping your wrist relaxed. Then swing the hammer back toward the ground, aiming for the center of the nail. The impact of the hammer hitting the nail should be felt. Practice swinging your hammer on a block of wooden until you feel comfortable.
The hammer should be held close to your body when you are ready to begin driving the nail. Place the nail so that it is perpendicular with the wood's surface. Keep your focus on the tip of each nail. Then, swing the hammer forward. Next, follow the motion of your hammerhead. Continue this motion several times, slowly increasing the speed of each swing. Once you've mastered the technique, try adding power to your swings. Try holding the hammer above your shoulder and bring it down forcefully. You will be able to use more energy and put your best foot forward.
Once you have made the first hole, remove your hammer. The rest of the nails can be pulled out using a screwdriver, pry bar, or a hammer. To avoid splitting the wood, make sure the nail heads are not touching the board's surface.