
There are a few tools that can be used to add texture or color to furniture or scenes. A nail set is a common tool. It's used to set nails and can also make small dimples into wood. A chisel can be used for small areas. Chisels can be used to create uneven, slightly faceted surfaces. You can create amazing surfaces with any type of tool, regardless of what you choose.
Substance Designer
This is the place to go if you're searching for a node based texturing tool. Substance Designer is a powerful texturing tool that allows you to create bitmap textures, Substance file, and procedural effects. Substance designer includes GPU-accelerated Baking, a noise generator, as well as hundreds of updated editing tools. It is one of the most popular tools among 3d artists and game developers.
The software is easily integrated into existing work environments. While Substance Designer comes with a number of features, it is designed to fit right in with your workflow. While there aren't any release notes for this app, the latest version was published last year. Substance Designer could be worth your time if 3D texturing is new to you. A free trial version of Substance Designer is available to give you an idea of how the program works.
Material Baker 2
Material Baker 2 has texturing tools that allow you to create highly detailed and realistic textures. You can also bake a texturing element into a single vertice or multiple vertices to replace the original color. Baked textures have a different resolution and sampling quality depending on how many vertices you have and the size of your mapping image. Material Baker 2 works with all major game engines. For more information, see the Material Baker 2 help manual.

The Bake Section lists materials assigned to selected mesh items. The Bake Section allows you to select a material and view the associated objects. This tool requires knowledge about materials and shaders. The baked image is then placed in the Material, as a separate unconnected texture node. The baking workflow has not changed. New tools have been added to help fix texture problems such as too thick or too short.
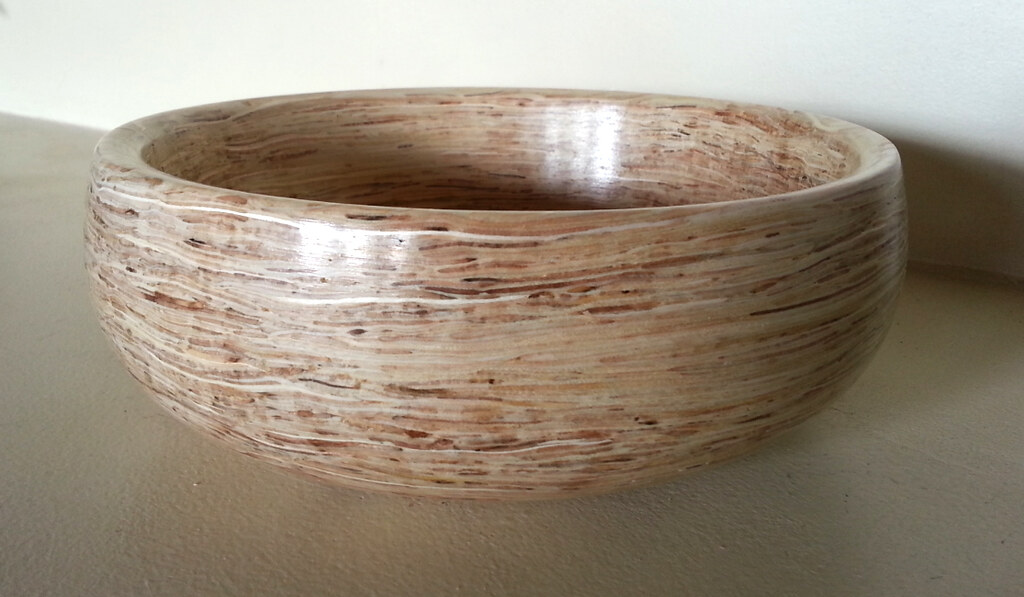
Robert Sorby Texturing Tool
Robert Sorby Texturing Tool - A versatile tool for woodworkers. It creates a variety texture on both flat- and end-grain. These textures range from soft and tactile texture to rough and dramatic. This versatile tool can be sharpened with the included diamond hone and comes complete with instructions. It is great for woodworking projects of any size and complexity. It comes in two sizes including the micro-sized.
The 310H is equipped with an interchangeable cutter, handle and spindle. You can alter the visual and tactile qualities of your work, and give it a unique look. It is also versatile, and is great for woodturning projects. This tool is versatile and can be used with both hard and soft woods. It will give you hours of fun. You can choose to have it mounted on a handle or stand alone. Additionally, you can add spiralling cutters and tool rests.
Mari 3D paint tool
Mari 3D paint tools support UDIM workflows. They also offer a wide selection of textures, materials, and other options. Its Python API lets technical artists automate workflows and integrate them into their pipelines. The comprehensive Materials System enables rapid creation of high-volume assets. Mari's easy-to-use and robust features make it a great choice for beginners. This article will discuss the advantages of Mari for 3D Painting.
Mari was originally developed as a proprietary tool by Weta Digital. Weta Digital is a visual effects firm. This software was created specifically for the Avatar project. It can create high-resolution textures on complex models, and it will remain responsive to any scale. It is more focused on creating texture contexts for animation and scenes than on individual objects. It's easy-to-use makes it ideal for any type of 3D painting project from a demo reel to an entire movie.
Autodesk Mudbox
Mudbox textures can be used to improve the quality of your 3D models. Autodesk Mudbox texturing software is easy to use and offers powerful options. Import meshes made with scan and/or sculpt data. This software allows you to bake normal and displacement textures. Additional features include dynamic tessellation, ambient occlusion and dynamic tessellation. Autodesk Flame is also available for data linking.
Mudbox supports a wide variety of mesh types. Quad meshes can be used to make sub-divisions. This will greatly simplify your workflow. The program also comes with UV coordinates, which are used to paint 3D objects and attach texture maps to them. If you are working with a complex polygon model, you should unwrap and cut vertexes to accommodate texturing.
FAQ
How much should a skilled woodworker earn per hour?
The hourly rate for a professional woodworker varies depending on many factors, including skill level, experience, availability, location, and other variables.
An hourly wage for skilled woodworkers is between $20 and $50.
A less experienced woodworker may charge as little as $10 an hour.
How do you calculate woodworking costs?
It is crucial to keep project costs as low-cost as possible. Always make sure you get the best price on materials. You should also consider other factors that could impact the cost of your project, such as experience, skill level, time, and money. You can find an estimate of the cost of different woodwork projects in our guide to common DIY tasks.
Where can I purchase hardwood lumber?
Home Depot offers hardwood lumber. They carry a variety of wood products such as flooring, cabinets, and furniture.
They also have an extensive selection of engineered hardwoods such as Ipe (Araucaria Angustifolia), Brazilian Cherry (Pau d'Arco), and Mahogany (Swietenia Macrophylla).
These woods can also be purchased online by simply searching Google for "hardwood timber"
Statistics
- Overall employment of woodworkers is projected to grow 8 percent from 2020 to 2030, about as fast as the average for all occupations. (bls.gov)
- The best-paid 10 percent make $76,000, while the lowest-paid 10 percent make $34,000. (zippia.com)
- Average lumber prices rose about 600 percent between April 2020 and May 2021. (familyhandyman.com)
- If your lumber isn't as dry as you would like when you purchase it (over 22% in Glen Huey's opinion…probably over 10-15% in my opinion), then it's a good idea to let it acclimate to your workshop for a couple of weeks. (woodandshop.com)
External Links
How To
How to stain wood
Staining wood is the process of applying chemicals to the wood's exterior, which alters its color. This chemical reaction changes the wood's color from white to brownish. Although oak is the most popular type of wood to stain, there are many other types that can be used.
There are many methods to apply stain to wood surfaces. One method involves mixing the stain and a solvent and then spraying it on the wood. You can also apply a solution containing water and dye directly to the wooden surface. The stain can be mixed with paints and varnishes to become part of the final coating.
Preparing the surface for staining wood is the first step. To apply the stain, clean the wood completely. Sanding the wood removes scratches and imperfections. The next step is to choose the stain type you want. There are two basic kinds of stains: penetrating stains and non-penetrating stains. Penetrating stains penetrate deeper than non-penetrating stains, which makes them great for dark colors like mahogany. Non-penetrating oils work best when used with light colors, like maple.
After deciding on the type of stain, you want to apply, prepare your tools. You can use a paintbrush to apply stains. This allows you spread the liquid evenly over the surface. To remove any stains left behind after painting, you will need some rags. You should have enough containers to store the various components of the stain mixture if you intend to mix it yourself.
After you have prepared the materials, you can clean the area where you want to stain the wood. Clean the area with soap and warm water to get rid of dirt and grime. You can wipe down the entire furniture using a damp rag with clean water. If you intend to stain darker wood, make sure you get rid of any debris.
Next, apply the stain. Start at one end of the piece of furniture and brush or spray the stain onto the wood. Move slowly and carefully along the grain of your wood until you reach its opposite end. Make sure that the stain does not drip off the edge of the wood. Let the stain dry completely before proceeding with the next steps.
To protect the painted surface, apply a coat of clear polyurethane sealant. Three coats of polyurethane sealing agent are required. Allow the third coat, which should dry overnight, to dry before sanding.