These tips should be read before you use your scrollsaw. These tips will allow you to safely and effectively use your scrollsaw. You should also ensure that the scrollsaw is securely fastened to the workbench. Otherwise, it is susceptible to vibration and may slide along the workbench. Finally, ensure that the blades have been properly installed. After you have completed all of these steps, you can start making furniture. You are now ready to use the scroll saw.
Dust blower
General International 21" Tilting Head Scroll Saw includes solid upper arms and lower parallel arm for stable operation. The saw also has a dust collector hookup so that you can collect any sawdust while you work. This saw cuts fine lines without making too much noise. The dust blower can be easily adjusted to adjust the airflow direction. You can also use this saw as a shop vac if you have one.
Tilting table
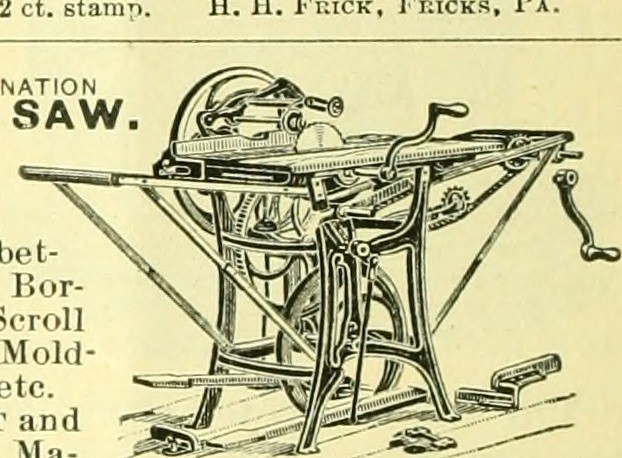
This article will show you how to use a scroll saw and tilting table. Many people like to spend hours on a scroll saw, but hunching over it for extended periods can be very uncomfortable, especially if you have a stiff neck or shoulders. There are many ways to remedy this issue and make your scrollsaw easier to use.
Spiral blades
Straight blades are best for making straight cuts on your scrollsaw. While it can be tedious to switch between straight and spiral blades, it can be easier and produce better results. Spiral blades are a good choice if you want a simple blade that can be used to cut through many materials. These blades have teeth which extend to the ends of the blade.
Variable speed
It is essential to choose the best scroll saw blade for you project. Scroll saw blades can be made in many tooth configurations and sizes to match different types of materials. The number will indicate how thick the blade is. For thinner woods, you will need a smaller blade. Listed below are some of the features of the best scroll saw blades. A blade that is the right size for the material you are cutting will ensure you get the best results.
Transferring patterns onto colored carbon paper

Before you begin carving you might want to transfer patterns onto colored Carbon Paper. You can place the desired patterns on a piece or carbon paper and then tape it to the other end. Clear packaging tape works well, since it doesn't require adhesive remover or sanding. After you have taped your design onto the carbon paper, trace it with a pencil or ballpoint pen. You should not move the pattern papers during tracing or you might accidentally cut the wrong pattern.
Keep several blades handy
It's worth having spare blades in case you are a beginner at scroll saw use. A scroll saw has a lot of potential for miscuts. This is why it's crucial to adjust the tension of the blade before starting. If the blade isn’t properly tightened, it can break. It’s also a good idea for budgeting for spares. Additional blades can also be purchased online or at your local hardware shop.
Using a pencil with an eraser
It's a good idea for scroll saw users to draw a plan in pencil before attaching it to the workpiece. Before you start your project, make sure to check the settings of your scroll saw. After marking the design in pencil and drilling a 1/4 inch hole through it, you can begin to drill the hole. Thread the blade through the hole and work gently out to the corners. You must be careful when guiding the blade to avoid any injuries.
The right blade

It can be confusing when buying a scroll saw for the first time. There are many different types of blades. You might try several to get a feel for which type is right for you. Each type of blade has its own design and function, and is made for a particular type of job. Here are some tips on how to choose the best scroll saw blade.
FAQ
What's the difference?
Hobbyists are passionate about making things from wood, while professionals tend to be more focused on the quality and craftsmanship of their work. Hobbyists tend to take pride and share their creations with family and friends. Professionals will spend hours researching designs before they begin working on a project. They will pay attention to every detail, from selecting the best materials to finishing the project perfectly.
What kind wood should I use for my project?
The most commonly used woods for woodworking are oak, maple, cherry. Each wood variety has distinct characteristics that influence the final product's look and feel. Oak is a darker wood and tends to be more durable than other types. Birch is light and soft, while mahogany can be heavier and more dense. You can also choose from solid wood or veneers. Veneers are thin wood sheets that are glued together to form one layer.
How do I get started with woodworking?
Building furniture is the best way to learn how furniture is made. You'll need tools, and you'll have to make mistakes along the way, but if you keep at it, you'll eventually figure out what you're doing.
You should first choose the project you wish to complete. You could make something as simple or complex as a box. Or you could build a whole entertainment center. Once you have settled on a specific project, it is time to find a woodworker in your area who is experienced in such work. Ask them for suggestions on the tools you will need and where to buy them. Ask if you can find someone who does this kind work.
Do I have to refinish my furniture?
Yes! There are many options for refinishing furniture that you don't need to hire a professional. Here are a few ideas:
Use sandpaper for removing stains and scratches. Then wipe down the surface with a clean cloth.
Clear polyurethane varnish should be applied. Let dry completely before moving furniture around.
Acrylic paint is a great way to paint furniture.
You can stain the furniture instead of using paint. The stain will give the furniture a rich look.
Use shellac wax. This will protect and shine the wood.
How do you calculate woodworking prices?
The most important thing to remember when calculating costs for any project is to keep them as low as possible. Always ensure you are getting the best possible price for materials. Also, consider all other factors that can affect the price of your projects such as skill level, experience, time and cost. To get an idea about the average cost for common household DIY tasks, see our guide to the average woodwork project price.
Statistics
- The best-paid 10 percent make $76,000, while the lowest-paid 10 percent make $34,000. (zippia.com)
- The U.S. Bureau of Labor Statistics (BLS) estimates that the number of jobs for woodworkers will decline by 4% between 2019 and 2029. (indeed.com)
- Overall employment of woodworkers is projected to grow 8 percent from 2020 to 2030, about as fast as the average for all occupations. (bls.gov)
- If your lumber isn't as dry as you would like when you purchase it (over 22% in Glen Huey's opinion…probably over 10-15% in my opinion), then it's a good idea to let it acclimate to your workshop for a couple of weeks. (woodandshop.com)
External Links
How To
How to make wood joints
This tutorial will demonstrate how to join two pieces together of wood. We will use the pocket hole joint, which is drilling holes in the wood to join them. This method is great if your wood's straight and smooth. If your wood isn't straight or flat, you might want to try another method, such as dowel joinery. Here are the steps
-
Drill Pocket Hole Joints. First, measure the area where you wish to place the pocket joint. With a handheld drill machine or jig saw, drill 3/4-inch deep holes in the ends of each piece.
-
Sand Smooth. Sanding the wood's edges will help ensure that the joint won't split later.
-
Glue the two sides of the wood together. Apply glue to both ends of the wood. Let it sit for about 5 minutes before clamping the pieces together.
-
Connect the pieces. After the glue has dried properly, clamp the pieces together to make sure they are flush.
-
Trim Joinery. After the glue dries completely, trim off any excess wood around the joint.
Be sure to leave enough space between each piece so that they can be turned inside-out.