
You are looking for free patterns of scroll saw silhouettes? Here are some sources. Scroll saw patterns with silhouettes are an excellent way for woodworkers to add detail. Whether you're looking for a whimsical animal design or a traditional silhouette, there is a scroll saw pattern out there for you. If you need a pattern for carving a bear, scroll saw patterns are available online for free. Scroll saw patterns can be used to create any object, including a frame mirror or a beautiful bowl.
Free woodworking scrollsaw pattern
If you're new to woodworking, you may be wondering what types of projects you can make with a scroll saw. There are many different woodworking projects you can do with this tool. There are many online patterns that can help you get started, from the most complex wood projects to the more straightforward. These patterns can be used for home projects as well as for kids. These patterns are free and you can display them anywhere.
A perpetual calendar is another type. This type of project requires several pieces, and can be a great way burn off your nervous energy while improving your skills. You can find a perpetual calendar plan online at Bearwood. All of the plans are downloadable, printable, and fully downloadable. To make a scrollsaw plaque with decorative details, you can also use one the free patterns. Make a pumpkin, if you want a completely different project. These make fantastic Halloween decorations.
Stacking
Stacking scroll saw silhouette designs is a great way for you to display your work and give it a professional feel. Scroll saw silhouettes come in a variety styles. There are simple patterns for beginners and more intricate designs that can be used by advanced users. No matter your level of scroll saw experience, there are patterns available to help beginners get started. These patterns can be used to create unique masterpieces. They're also great for kids to make and display.
Online, you can find free woodworking plans at sites related to woodworking. You should compare the information provided and make your final decision. This is especially true if you're just starting out with scroll sawing, because free patterns can be as easy or challenging as you'd like. This book features 120 complex designs that you can make. You will find detailed instructions along with step-bystep photographs and detailed instructions in this book.
Neal Moore's Book
This scroll saw silhouette pattern book contains dozens of projects, and includes a detailed guide on selecting the right wood and supplies. Each pattern can be easily modified to suit a wide range of craft media, including woodworking and jewelry-making. There is also fascinating astrological information in the book. The patterns are simple or complex and you can find the one that best suits your needs and style.
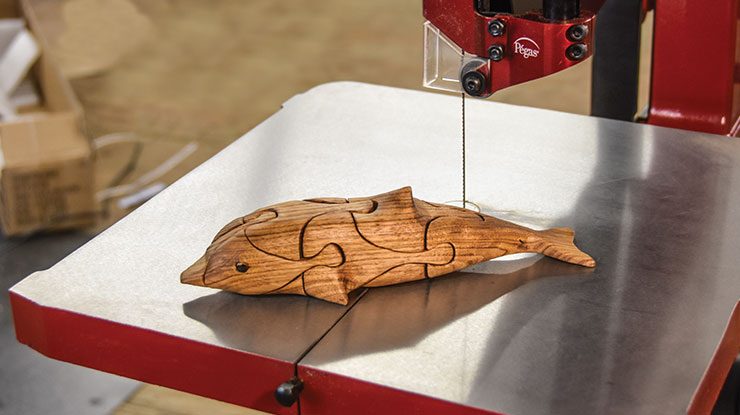
Beginners will find plenty to learn in this book, with everything from basic cutting techniques to more advanced skills. The projects include a fish silhouette and a butterfly with internal cuts. This book also contains information about new scroll saw manufacturers. This book is recommended to anyone new to woodworking. You will learn basic and advanced techniques to create beautiful scroll saw portraits.
Neal Moore's book "Inlay with a Scroll Saw"
This guide for beginners to inlay using a scroll saw contains inspiring projects and step by-step instructions. Examples include everything from die-cut stationary to a butterfly that has interior cuts. There are also designs for unique wooden ornaments and creative wooden boxes. Neal Moore is an expert in safe use of the scroll saw and you are sure to find something that interests you.

Neal Moore also includes over 50 patterns. A section is included on how to get started. The section on getting started teaches new scrollers how to choose wood, cut patterns and transfer them to their own projects. For more advanced scrollers, there are also tips in the getting started section that will help them make their own patterns. Overall, this is a helpful book for beginner and intermediate woodworkers. It will be easy for you to follow along and create breathtaking masterpieces.
FAQ
Where can I purchase woodworking supplies
There are many places you can get everything you need, and you don't have to go far. For example, you could visit local hardware stores or look online at websites like Amazon.com.
You can also check garage sales and flea markets for old furniture and other materials you can reuse.
How do you know which tools are the best for you?
When shopping for tools, it helps to think about your needs and preferences. What do you prefer: metal or plastic handles? What size screws or nails do you prefer? Are you comfortable with power tools, or would you rather use hand tools?
What woods can be used to make furniture?
Woods can be classified according to how hard they are. Softwoods include pine, fir, cedar, and cypress. Because they are resistant to rot, softwoods are often used as outdoor furniture. The hardwoods include teak, maple, mahogany and oak. They are generally indoors as they don't weather well outside.
You can learn how to woodwork.
The best way to learn anything is by doing. Woodworking takes practice, skill, patience and experience. To master any craft, it takes time.
The best way to learn how to do something is actually to do it. So start small and build on what you have learned from there.
What kind of wood should I use?
The most commonly used woods for woodworking are oak, maple, cherry. Each type of wood has its own unique characteristics that can affect the final product's appearance. Oak is a darker wood and tends to be more durable than other types. Birch, which is lighter and soft, is more heavy than mahogany. You can also choose from solid wood or veneers. Veneers are thin sheets of wood that are glued together to form a single layer.
What type of tools does a carpenter use?
The most common tool used by carpenters is a hammer. A hammer is used for pounding nails into wood. This helps to keep pieces together when they are working on a project. Other tools include clamps, pliers, screwdrivers, measuring tape, pencils, saws, drills, and wrenches.
What furniture can I refinish?
Yes! There are plenty of ways to refinish old pieces of furniture without having to pay a pro. Here are some ideas:
Sandpaper can be used to remove stains and scratches. Use a clean cloth to wipe the surface.
Apply clear polyurethane finish. Before moving furniture, let dry completely.
Acrylic paint can be used to paint furniture.
Stain can be used instead of paint. The furniture will have a rich look thanks to the stain.
Use shellac wax. Applying wax will give the wood shine and protection.
Statistics
- Most woodworkers agree that lumber moisture needs to be under 10% for building furniture. (woodandshop.com)
- In 2014, there were just over 237,000 jobs for all woodworkers, with other wood product manufacturing employing 23 percent; wood kitchen cabinets and countertop manufacturing employing 21 percent. (theartcareerproject.com)
- If your lumber isn't as dry as you would like when you purchase it (over 22% in Glen Huey's opinion…probably over 10-15% in my opinion), then it's a good idea to let it acclimate to your workshop for a couple of weeks. (woodandshop.com)
- Overall employment of woodworkers is projected to grow 8 percent from 2020 to 2030, about as fast as the average for all occupations. (bls.gov)
External Links
How To
How to stain wooden surfaces
Staining wood is the process of applying chemicals to the wood's exterior, which alters its color. The wood will turn from white to brownish-red due to the chemical reaction. The most common type of wood used for staining is oak, although many other types of wood can be stained.
There are many ways to stain wood surfaces. Some methods involve mixing the stain with a solvent (such as turpentine) and then brushing or spraying the mixture onto the wood. Another method involves applying a solution of water to the wood. You can mix stains into varnishes or paints to make them part of your finish coat.
The first step in staining wood is preparing the surface. Cleaning the wood thoroughly removes any dirt or grease that could interfere with applying the stain. Sanding smoothens scratches and rough spots. The next step is to determine the type of stain you would like to use. There are two basic kinds of stains: penetrating stains and non-penetrating stains. Penetrating stain penetrates deeper into wood than nonpenetrating, making them suitable for dark colors like mahogany. The best non-penetrating colors are those that work with light colors like maple.
After deciding on the type of stain, you want to apply, prepare your tools. Because you can spread the stain evenly with a paintbrush, it is ideal for applying them. A few rags are also handy to clean up any spillages after you have finished painting. If you are planning to mix your stain, ensure you have enough containers for each component.
Once you have prepared your materials, start by cleaning the area where you plan to stain the wood. Clean the area with soap and warm water to get rid of dirt and grime. Use a dampened sponge and warm water to clean the entire piece. If you intend to stain darker wood, make sure you get rid of any debris.
Apply the stain next. Apply the stain by brushing or spraying it onto one side of the furniture. Slowly and carefully move along the grain of wood, slowly but steadily, until you reach the other end. You must be careful not to allow the stain to drip off the wood's edges. Let the stain dry completely before proceeding with the next steps.
A coat of clear polyurethane sealing agent is applied to protect the paint. Three coats of polyurethane sealing agent are required. Allow the third coat to dry overnight, before sanding.