
Whittling projects can be a lot of fun! In just a few minutes, you can make a Gnome, Cat or Leprechaun. Here are some suggestions to get you started. It doesn't matter if you are an expert or a beginner, you can create unique pieces of art. It doesn't really matter how skilled you are, it will be fun. And you can even learn to make it with a video tutorial!
Leprechaun whittling project
Although leprechauns might look cartoon-like, they are much more. These tiny creatures can also be useful toys. Wood ducks can be easily made from basswood. They can also be painted in any color you choose. Get started with your Leprechaun Whittling Project by selecting a small wooden block. It's very easy to carve an leprechaun, even if you are not a professional.
The leprechaun carving guide will show you how to carve your own leprechaun. While the actual carving is simple, all tools are included. You can skip the finger carving for beginners. Although it is not required, it can be tricky. Although the base can be tricky, you can always substitute wider shoes for more confident carving.
Rabbit whittling project
To begin your rabbit whittling project, you'll need to prepare your materials. A high-quality wood carving knife and nontoxic oil are essential. It should take approximately five minutes to make the basic cuts. The finishing process will take longer. Here are some tips to create the perfect rabbit carve. Before beginning, think about the size of your rabbit. The border should be thicker than your rabbit's body. The thick border will serve two purposes. It will protect the wood from cracking and it will make the image appear more dimensional.
The easiest project for beginners is to make a small ball inside a cage. This project is great for beginners. You can also gift the finished product as a Valentine's Day gift or use it to make a cup. It will require patience, but the end result will be worth it. A few hours of whittling will give you the confidence to tackle more complex projects, such as carving animals or figurines.
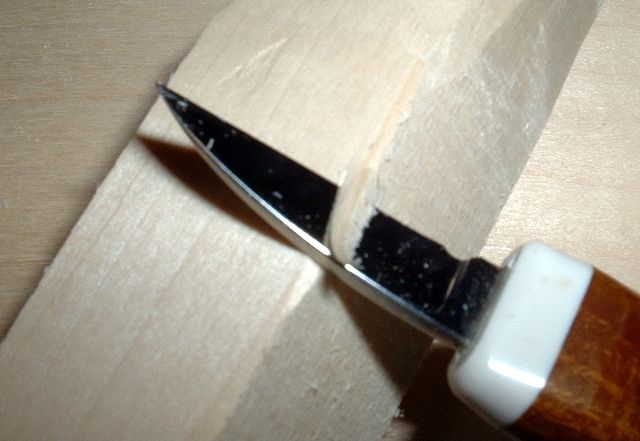
Cat whittling project
If you're a beginner in woodcarving, the best whittling project to start with is a cat. This small sculpture requires little work but can teach you important skills. Although you don’t need an expert knife or other advanced materials, this small sculpture can teach you important skills. It is best to sharpen it using a leather strop before you begin your project. Repeat this process 10 to 20 times for each side of your knife.
Gnome whittling projects
You might think that this is not a difficult woodworking project, but it turns out it can be very challenging. To cut the gnome's face & hat, you will need a scroll saw. Make sure that the hat does NOT overhang the face. If you want to make a gnome that is impressive, add details to its face.
Both the coat and the hat were made of wood. For shaping them, you will need to cut a V below the top and another under the bottom guidelines. Once you have cut the hat and coat, you can shape your gnome's shoulders and back. The stop cut allows you to separate the pieces so you can shape the rest of your gnome's facial features.
Astronaut caricature caricature caricature caricature caricature
Carving an astronaut is not an easy task, and it requires patience, focus, and delicate handling. Whittling tools, such as spoon carving knives, are essential for a successful caricature. To make your caricature project more manageable, you can buy whittling templates if you are a beginner. Wood carving can be done step by step with tutorials.
Fairy caricature

If you'd like to surprise someone with a custom-drawn fairy portrait, consider a woman princess fairy caricature. This custom-made fantasy cartoon art drawing can be a lovely gift. You can also request extra features or preferences for your caricature. Artists will consider customer feedback when creating the caricature.
A great caricature will not be a stereotype. However, it will exaggerate to convey a message. Although it is sometimes awkward and insulting to do this art, it can make a character seem real. It might also convey a message. It can be used to tell stories, regardless of whether it's about fairy tales and political issues.
FAQ
What kind of tools are used to carpenters?
A hammer is probably the most widely used tool for carpenters. The hammer is used to pound nails into wood. It also helps them hold pieces together while they are working on a project. Other tools include clamps and pliers, screwdrivers as well as measuring tape, pencils and saws.
Do I have to refinish my furniture?
Yes! You don't have to hire a professional to refinish furniture. There are many ways you can do it yourself. Here are some examples:
Use sandpaper to remove scratches and stains. Finally, use a clean cloth or sponge to clean the surface.
Apply clear polyurethane finish. Before moving furniture, let dry completely.
Use acrylic paint to paint furniture.
Use stain instead of paint. The stain will give the furniture a rich look.
Shellac wax can be applied. Wax will protect the wood and add shine.
Are you able to teach yourself woodworking
Doing is the best way to learn any subject. Woodworking requires patience, practice and skill. Every craft takes practice and patience.
The best way to learn how to do something is actually to do it. Start small and then build upon what you've learned.
What is the difference in plywood and particleboard?
Plywood is made up of layers of wood pressed together under pressure. Plywood is available in a variety of thicknesses. It is often used to make cabinets or flooring. Particle board is made up of sawdust mixed in resin, then compressed into large pieces. It is used primarily for home improvements. Both types of boards are durable and easy to cut.
Which material would you recommend for woodworking lessons?
You can start with softwoods like pine or poplar. You will feel more comfortable with these softwoods, so you can move onto hardwood.
How can I learn basic woodworking skills
It is an excellent way to learn how to build furniture. You can make a simple bench yourself. This project can be done with any kind of wood that you have at home. If you're not sure which kind of wood to choose, you can purchase cheap pine boards at Lowes and Home Depot. After you've built your bench, you'll want to sand off all the rough edges and finish it with a stain or varnish.
Statistics
- In 2014, there were just over 237,000 jobs for all woodworkers, with other wood product manufacturing employing 23 percent; wood kitchen cabinets and countertop manufacturing employing 21 percent. (theartcareerproject.com)
- The best-paid 10 percent make $76,000, while the lowest-paid 10 percent make $34,000. (zippia.com)
- Average lumber prices rose about 600 percent between April 2020 and May 2021. (familyhandyman.com)
- The U.S. Bureau of Labor Statistics (BLS) estimates that the number of jobs for woodworkers will decline by 4% between 2019 and 2029. (indeed.com)
External Links
How To
How to make wooden joints
This tutorial will show you how to join two pieces of wood together. The "pocket hole joint" is a method whereby we drill holes into the wood and glue them together. If your wood is straight and flat, this method will work well. Dowel joinery might be a better option if your wood is not straight or flat. Here are the steps
-
Drill Pocket Hole Joints. Start by measuring and marking the spot where the pocket hole joint will be placed. With a handheld drill machine or jig saw, drill 3/4-inch deep holes in the ends of each piece.
-
Sand Smooth. The wood's edges can be sanded to prevent splitting.
-
Glue Together. Apply glue on both sides of the wooden plank. Allow it to sit for approximately 5 minutes before you clamp the pieces together.
-
Attach the Pieces together. Once the glue has dried, clamp the pieces together so they are flush.
-
Trim Joinery. After the glue dries completely, trim off any excess wood around the joint.
Be sure to leave enough space between each piece so that they can be turned inside-out.