
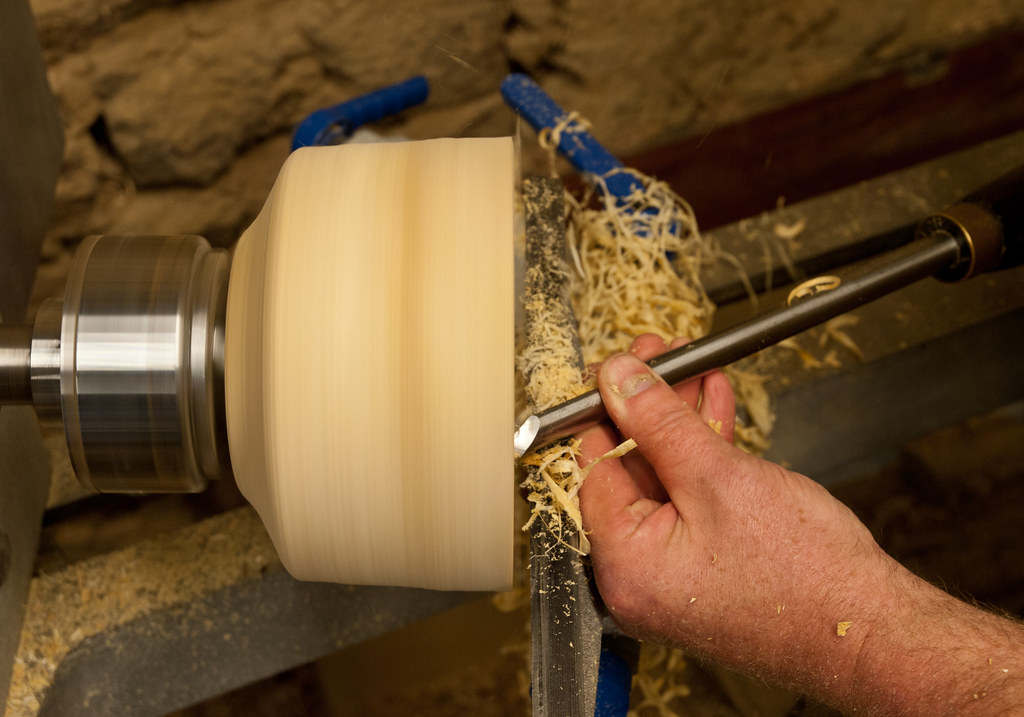
Ride the bevel, a fundamental turn technique, is essential. It involves several key steps. You hold the shaft of the tool in your hands and move it forward until the cutting edge touches the stock. As the tool advances, slowly raise it until the cutting edges touch the stock. The bevel does not cut through the stock. Once the cutting blade has been engaged by the stock you will need to lower the handle and then raise it again until the cutting tip is fully engaged.
Wood turning, a specialty branch of woodworking, is one example.
The practice of wood turning is a popular hobby for people who love the tactile nature of wood and working with their hands. This specialized branch of woodworking can be a rewarding hobby for beginners and experienced woodworkers alike. Demonstrations should not exceed six to ten minute in length. During the demonstration, you should leave most of the stock in place so that you can focus on designing your piece.
Woodturning is a dangerous activity that can cause eye damage. The wood turning process involves poking a sharp metal tool into the spinning wood. Wearing goggles will protect your eyes. A face shield will stop the burl from hitting you nose and causing injuries. Wood dust can also cause skin allergies and respiratory problems. Finally, wood shavings from wood turning can cause skin irritation.
It takes less wood
Woodturning can also be done with any type of tree. However, certain pieces are easier to work with than others. Woodturning stock may be made from any section of a single tree. However, some trees have better grains and figures than others. These are some tips that will make your woodturning project run faster. First, select stable material. Select lumber that is stable and won't move or warp. Make sure you choose a piece that has tight bark. Tight bark resists being checked and allows the woodworker or artisan to create an edge vessel.
A wooden blank is used to turn basic techniques. Finding a lumber yard is the first step. A big sawmill will split a large log into smaller segments. These sections can then be cut further using a tablesaw or bandsaw. DIYers can also cut the lumber themselves to create blanks. Most fleshly-cut wood can be dried before being turned. This method prevents cracks, which is important for quality turning projects.
It is also more stable
A Swiss-style lathe is a great choice if you want a more stable cutting environment. While bar stock is never perfectly straight, it can set up vibrations that can affect tool wear and precision. Swiss-style lathes are not equipped with belt drives and produce less vibration. Likewise, the sliding headstock must move smoothly and with precision to avoid the effects of harmonic vibrations from high-speed rotation. The sliding mechanism has preloaded roller plates that allow for smoother movement. The vibrations created by high-speed rotation are harmonic. The sliding mechanism can absorb these vibrations.
FAQ
Are there any other things I should know regarding woodworking?
It is easy for people to overlook the work involved in furniture making. Finding the right kind of wood is the most difficult part. There are so many wood options that it can be difficult to choose the right one.
Another issue is that wood does not have the same properties. Some woods will warp over time, others will split or crack. These factors should be taken into account before buying wood.
Is it difficult to start my woodworking business?
It is difficult to start your own woodworking company. There are many laws and regulations you need to be aware of. However, it doesn't necessarily mean you must go through all the hassle of setting up a business. Many people join already-established businesses. This allows you to join existing businesses and pay only membership fees.
Where can I purchase hardwood lumber?
Home Depot offers hardwood lumber. You will find a range of wood products available at Home Depot.
There is also a wide selection of engineered hardwoods, including Ipe (Araucaria Angustifolia), Brazilian Cherry(Pau d'Arco), Mahogany (Swietenia Mcrophylla).
You can search Google for hardwood lumber to find them online.
How do I learn basic woodworking skills?
It is an excellent way to learn how to build furniture. You can make a simple bench yourself. You can use any wood you have in your home to complete this project. If you are unsure what type of wood is best, you can get cheap pine boards at Lowes (or Home Depot) instead. Once you have built your bench, you will need to sand it off and then finish it with a stain/varnish.
Where do I start with woodworking?
It is best to actually build furniture to learn how to make it. While you will need tools and make mistakes, you will eventually master the art of building furniture.
Start by choosing a project you'd like to complete. It can be something as simple and small as a box, or large-scale as an entertainment center. Once you have chosen a project, locate a local woodworker who is skilled in this kind of work. Ask the local woodworker for help in deciding what tools and where to get them. Ask if you can find someone who does this kind work.
Can I succeed in woodworking if I'm a genius?
No. Woodworking is not difficult. Anyone can learn how to use basic power tools and techniques to create beautiful works of art.
Statistics
- The best-paid 10 percent make $76,000, while the lowest-paid 10 percent make $34,000. (zippia.com)
- Most woodworkers agree that lumber moisture needs to be under 10% for building furniture. (woodandshop.com)
- Overall employment of woodworkers is projected to grow 8 percent from 2020 to 2030, about as fast as the average for all occupations. (bls.gov)
- Woodworkers on the lower end of that spectrum, the bottom 10% to be exact, make roughly $24,000 a year, while the top 10% makes $108,000. (zippia.com)
External Links
How To
How to stain hardwood
Stain wood is a process that involves applying chemicals to the surface of wood, which changes its color. This chemical reaction changes the wood's color from white to brownish. Oak is the most common wood type for staining. However, you can also use other wood types.
You can apply wood stains in many different ways. You can mix the stain with a solvent, such as turpentine, and spray it onto the wood. Others use a solution made up of water and dye, which is then applied directly onto the wood. You can also mix stains with varnishes or paints so that they become part the finish coating.
Preparing the surface for staining wood is the first step. Cleaning the wood thoroughly removes any dirt or grease that could interfere with applying the stain. Sanding can smoothen out scratches and uneven spots. Then you must decide what kind of stain you want to use. There are two basic kinds of stains: penetrating stains and non-penetrating stains. Penetrating colors penetrate deeper into wood than those that are non-penetrating. This makes them more suitable for darker colors, such as mahogany. Non-penetrating stains work best with light colors like maple.
Once you have decided on the stain type that you want, get your tools ready. You can use a paintbrush to apply stains. This allows you spread the liquid evenly over the surface. To remove any stains left behind after painting, you will need some rags. If you plan to mix the stain yourself, make sure you have enough containers available to hold the different components of the mixture.
Once you have prepared all your materials, it is time to clean the areas where you will stain the wood. Clean the area with soap and warm water to get rid of dirt and grime. Use a dampened sponge and warm water to clean the entire piece. Make sure you eliminate any loose debris, especially if you plan to stain darker wood.
The stain should be applied next. The stain can be applied by spraying or brushing the stain onto one end of the furniture. Slowly and carefully move along the grain of wood, slowly but steadily, until you reach the other end. The stain should not drip off of the wood's edge. Allow the stain to dry completely before you move on to the next step.
Protect the painted surface with a coat polyurethane paint sealant. Apply three coats polyurethane sealer. Allow the third coat to dry overnight before sanding the final coat.