
Sharp edges enhance the enjoyment of wood carving. Here are common techniques for sharpening your wood carving tools. Sharper edges last longer and are more durable than dull ones. Sharp edges will also make it easier to use your tool more efficiently. Sharp edges simplify carving and increase cutting efficiency. These are the three most common ways to sharpen wood carving instruments. Continue reading to find out more. - Sharpening a stone.
Sharp edges are a great way to enhance your carving experience
You can carve the most beautiful things with sharp tools. Sharp tools make carving easier and require less effort. Also, a blade that has been sharply cut leaves a smooth surface. For a successful carving project, sharp tools are crucial. Sharpen your tools often to achieve the best results. Regular sharpening will keep the tools sharp and makes carving easier.
Sharp edges can increase the pleasure of carving but they can also cause blisters. Wood's natural texture will be rough. Regular handling will help to make your hands more durable. While blisters can eventually heal into calluses (which is often painful and time-consuming), this process can take a while. You can try changing the way you hold your carving tools to reduce blisters. It may take some practice, but the effort will be well worth it.
Use a sharpening knife and a fine grain stone to sharpen your knives. Also, check the edge for damage. Chips along the edge will need to be ground more vigorously. An edge that is dull may need minimal grinding with a finer grinder. You can also test the knife by slicing through a piece or paper of rope. The knife may be able to be sharpened without the need for a sharpening tool if it has not been dulled in a while.
Common techniques for sharpening wooden carving tools
There are many options for sharpening wood carving instruments. There are several ways to sharpen wood carvings tools. Oil stones require oil to apply to the stone's exterior to prevent metal particle embedding in the surface. Diamond and ceramic stones are oil-free and can be used to sharpen carbide wood carving tools. This article will cover the most common methods of sharpening wood carving instruments.
A leather strop can be used to remove wire edges from blades and polish them. Although a leather strop works well for most tools, some carvers prefer to use a textured one. A flat leather strop is best for straight tools, or the outside edge gouges. For those who take their work seriously, a leather strop that has grooves may be a good investment.
Bench chisels are traditionally sharpened at a 25-degree angle with a five-degree secondary bevel. Modern alloys are not compatible with these angles and may crack. This means that you will need to raise your bevel angle. This will mean that you need to use more force and have less control. Block planes are sharpened at a twenty-degree angle.
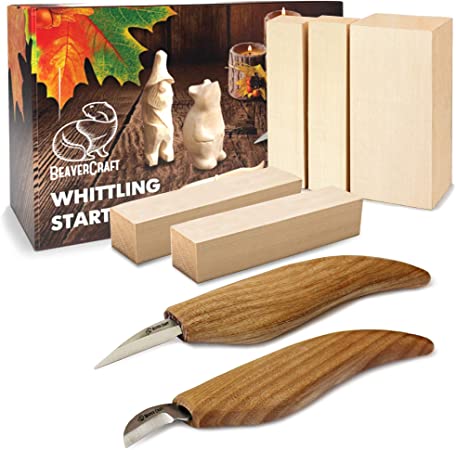
Sharpening stones
To sharpen wood carving tools, you can use a sharpening stone. A sharpening stone is made of grit, which is a mineral that has crystal form and is more durable than steel. In order to make the stone's cutting process easier and prevent metal particles being embedded, a lubricant will be required. When your tool has been sharpened to a point that is sharp, it will be easier to use it to cut wood without resistance. The strop (often made of leather) is used to polish the edge, remove burr, and clean up the edges.
There are many different types of sharpening rocks on the marketplace. There are oilstones and waterstones as well as ceramic stones. Oil stones use oil as a liquid to keep fine metal particles and other contaminants from sinking into the stone. No lubricants are required for ceramic or diamond stones. They are both useful in sharpening carbide wooden carving tools.
The Sentima sharpening stone is a great example of a quality sharpening system. It has both a coarse stone and a fine stone made from corundum. This material features a consistent grain that allows for fast cutting and smooth finishes. Its unique design makes cleaning it simple. The sharpening system is made of durable materials and will last for years without degrading in quality.
FAQ
What is the difference in plywood and particleboard?
Plywood is made of layers of wood that are pressed together under pressure. Plywood comes in several thicknesses and is commonly used for cabinets and flooring. Particle board can be made from sawdust, resin, and then compressed to make large blocks. It's commonly used for home improvement projects. Both boards are strong and can be easily cut.
How can a novice woodworker make it big?
Many people are looking to create their own furniture and start an internet business. If you are just starting to build furniture, there are many other ways to make money than selling on Etsy. You could also sell at craft fairs, or other local events. Offering workshops could be another option for those who are interested in learning how to build their furniture. You might be able to offer services like remodeling homes or making custom pieces for clients if you are a skilled carpenter.
Is it possible to learn woodworking by yourself?
Learning by doing is the best way of learning anything. Woodworking requires patience, practice and skill. Any craft requires patience to master.
You can learn the most effective way to master a skill is by actually doing it. So start small and build on what you have learned from there.
Statistics
- Most woodworkers agree that lumber moisture needs to be under 10% for building furniture. (woodandshop.com)
- Overall employment of woodworkers is projected to grow 8 percent from 2020 to 2030, about as fast as the average for all occupations. (bls.gov)
- If your lumber isn't as dry as you would like when you purchase it (over 22% in Glen Huey's opinion…probably over 10-15% in my opinion), then it's a good idea to let it acclimate to your workshop for a couple of weeks. (woodandshop.com)
- Average lumber prices rose about 600 percent between April 2020 and May 2021. (familyhandyman.com)
External Links
How To
How to stain wood
Staining wood can be described as a process where chemicals are applied to the wood surface. This causes the wood to take on a new color. This chemical reaction causes wood to turn from whiteish to brownish. While oak is the most widely used type of wood for staining purposes, other types of wood are also available.
There are many options for applying stains to wood surfaces. You can mix the stain with a solvent, such as turpentine, and spray it onto the wood. Some methods involve a mixture of water and dye that is applied directly to the wood. Stains can also be mixed into paints and varnishes, becoming part of the finish coating.
Preparing the surface is the most important step in staining wooden surfaces. Clean the wood to get rid of any grease, dirt or other substances that might be detrimental to the stain's application. Sanding smoothens any scratches or rough spots. The next step is to determine the type of stain you would like to use. There are two basic kinds of stains: penetrating stains and non-penetrating stains. Penetrating and non-penetrating wood stains penetrate deeper than other types, making them perfect for dark colors like mahogany. Penetrating stains are best paired with lighter colors, such as maple.
After deciding on the type of stain, you want to apply, prepare your tools. You can use a paintbrush to apply stains. This allows you spread the liquid evenly over the surface. To remove any stains left behind after painting, you will need some rags. You should have enough containers to store the various components of the stain mixture if you intend to mix it yourself.
After you have prepared your materials for staining, clean the area. To remove dirt and dust, use warm water and soap. You can wipe down the entire furniture using a damp rag with clean water. Make sure you eliminate any loose debris, especially if you plan to stain darker wood.
The stain should be applied next. Begin at one end and spray or brush the stain on the wood. Slowly and carefully work your way along the grain to reach the opposite end. Keep the stain from dripping off the wood's surface. Allow the stain to dry completely before you move on to the next step.
Clear polyurethane is used to protect the painted surfaces. Apply three coats with polyurethane. Allow the third coat, which should dry overnight, to dry before sanding.